expr:class='"loading" + data:blog.mobileClass'>

header code

Showing posts with label freebie. Show all posts

Tuesday, July 22, 2014

Vegas Baby, Vegas

I had the opportunity to attend the Teachers Pay Teachers first ever conference at the Venetian in Las Vegas on July 11.  I had so much fun seeing what the teaching blog stars look like in real life and learning how to be more successful at blogging and selling on TPT.  I met a few new blogging friends and I feel renewed to blog more.  Anyway, it was a cool experience and in honor of the TPT conference I have a few freebies....

Classroom Subway Art available in four slightly different color palettes....


Right click on any of the above images and save them to your computer.  I like to then send the file to Costco's photo department and then have it printed out there.  I designed the subway art to print out as an 8x10 or a 16x20 print.  Enjoy!
(font credits in order from top to bottom: 2Peas Renaissance, TXTGroovySmooth, WrexhamScript, 2Peas Gone Postal, 2Peas Class Act, {skinny} jeans solid, 2Peas Duck Duck Goose, TXTSodaShoppe)

Monday, July 16, 2012

We Are At...

So, where are you at in your summer planning and prepping?  I am no where near where I'd like to be at. My summer is flying by, a whirlwind of baby craziness, if you will.  I have not got nearly enough done to be ready for... duh duh duh duh... BACK TO SCHOOL!  My new students will roll into my classroom on August 8!  Can you believe that!  Here in the Phoenix area that is just asking for heat stroke during recess time if you ask me.  I wish the school board would dub me the boss of choosing the start and end dates of school.  I'm thinking the first Wednesday in September would be a better starting time and then we should go into June a bit.  June is much cooler here than August!  Anyway, enough of my rant, I have a freebie!  YES!  In my endeavors to find ultra cute things to add to my classroom this year I found inspiration from Jen at the go to teacher.  She fashioned a fancy little sign to post on the classroom door to inform people where the class is at.  So, I had to borrow the idea and make a few signs of my own.  You can nab them for FREE by clicking on the image you want and saving it to you computer.  I made them as 8x10 images so you can send them to Costco or where ever and print them out.  I plan on dressing up a jumbo paper clip with matching ribbons to use as a marker.  I'll have to post a photo when I finish.  Good luck with your summer plans and don't stress too much.
This is the neat idea from Jen at the go to teacher.

CREDITS
fonts:  LD Frosting and Century Schoolbook
Clip Art:  Mrs.Phippen
Papers:  unknown
Ruler:  unknown

CREDITS
Fonts:  TXT Soda Shoppe and Splendid
Clip Art:  Mrs. Phippen
Papers and Buttons:  Summertime Designs

CREDITS
Fonts:  TXT Groovy Smooth and TXT Soda Shoppe
Clip Art:  Mrs. Phippen
Papers and Ribbon:  Summertime Designs

CREDITS
Fonts:  skinny jeans and TXT Menu Item
Clip Art:  Mrs. Phippen
Papers and Ric-Rac:  Summertime Designs

CREDITS
Fonts:  Scrap Loop and skinny jeans
Clip Art:  Mrs. Phippen
Papers and ribbon:  Summertime Designs

CREDITS
Fonts:  2Peas Thrift Store Chair and skinny jeans solid
Clip Art:  Mrs. Phippen
Ribbon:  Summertime Designs
Papers:  Unknown

CREDITS
Fonts:  LD Traditional Cursive and LD Traditional Cursive Lined
Clip Art:  Mrs. Phippen
Ruler:  unknown
Paper:  unknown

CREDITS
Fonts:  2Peas Duck Duck Goose and LD Delightful
Clip Art:  Mrs. Phippen
Papers:  unknown
school blog signature

Sunday, June 24, 2012

Rookie Mistake and FREEBIES

So, I know I posted about putting the Writer's Eye Board file on Teachers Pay Teachers today.  Well, I just tried and I made a rookie mistake.  My file is way.  too.  BIG!  It only lets you have a 50 MB file and somehow my zip file was 347 MB.  Yowza!  I have to go back and tweek it so it'll work.  Sorry!  Here are a few teasers though...


If you'd like any of the above images as FREEBIES just click on any images you want then save it to your computer.  (If you have a PC right click on the image and save as).  Please remember that all the above images are my own work and they're copyrighted.  You may use them for classroom use only, unless you get permission from me.  Thanks for being respectful.  Have a happy night!

school blog signature

Tuesday, May 29, 2012

Just Eat It


So does anyone remember that Weird Al song Just Eat It?  For some odd reason that song popped into my head as I was thinking about this post.  I remember watching that music video as a wee lass and now I have a hauntingly funny memory of it.  Anyway, moving on to the post.  One of my favorite math concepts to teach my first graders is geometric shapes.  Not only do we explore the standard flat shapes such as triangles and squares but we get to delve into the discovery of three dimensional, solid figures like the sphere and pyramid. I love sending the children on a shape scavenger hunt around school.  This year I decided to do an edible math discovery so the kids could not only manipulate a geometric figure but just eat it too!  The kids and I had a blast investigating, sorting, and recording data about the snacks.  On the last day of school I surveyed my students and this lesson was the winner of THE BEST MATH LESSON EVER award. Try it with your kids, they won't be able to wait to Just Eat It.  Get this activity for FREE here.school blog signature

Wednesday, March 14, 2012

Value Time

So, I was snooping around on Pinterest, my new found addiction, and found a great idea. (The idea is from Mrs. T and her site is great so 
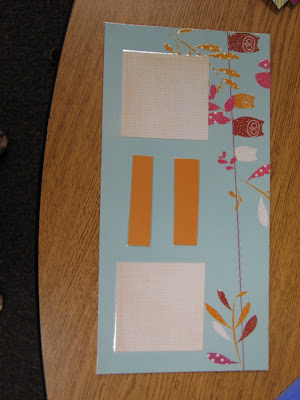
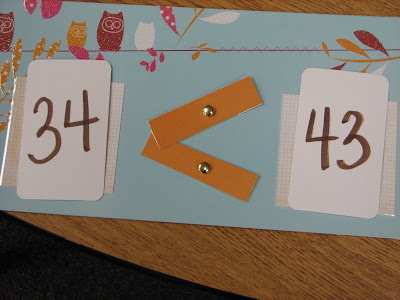
check it out here). Anyway, I decided to modify the idea and use scrapbook paper to make the value mats. First, I cut a 12"x 12" paper in half to make two 12" x 6" papers. I then cut two 3" x 3" squares and two 3" x 1" rectangles. I made a slew of mats at the same time and coordinated the different pieces to match each mat. I wanted to remember which pieces went with what mat so I numbered the back of the mat and the coordinating pieces. I glued the squares onto the mats, being careful to leave space for the little rectangles, then laminated both the mats and the little rectangles. After the laminating was a cut out I attached the little rectangles to the mats with fasteners. Now, the kids can determine if the value of two numbers they're given are less than, equal to, or greater than. So fun and easy.
Here are some pics for you visual learners:

1. Number on the back of the 6" x 12"


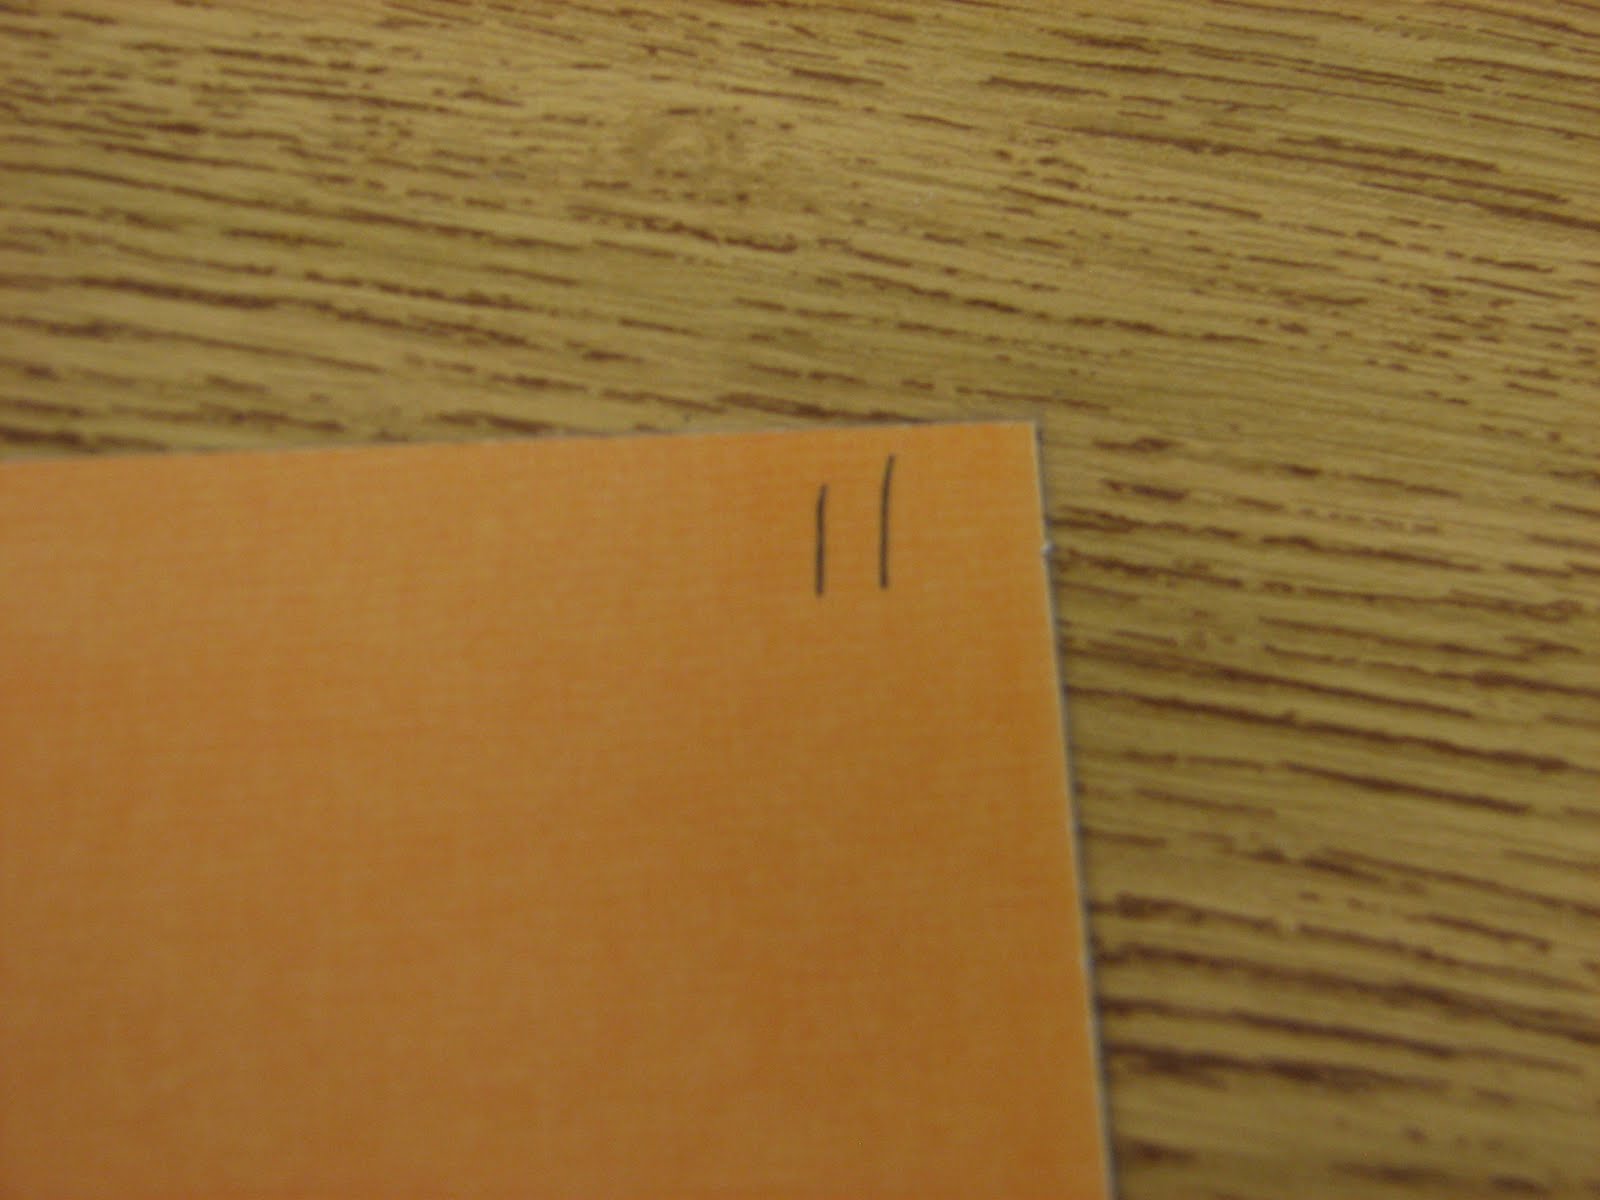
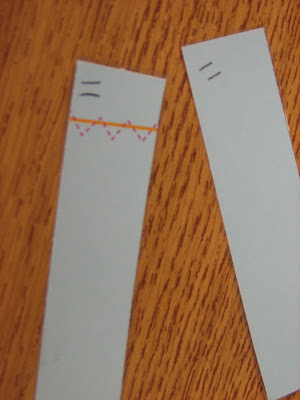
2. Number on the back of the 3" x 1" little rectangles


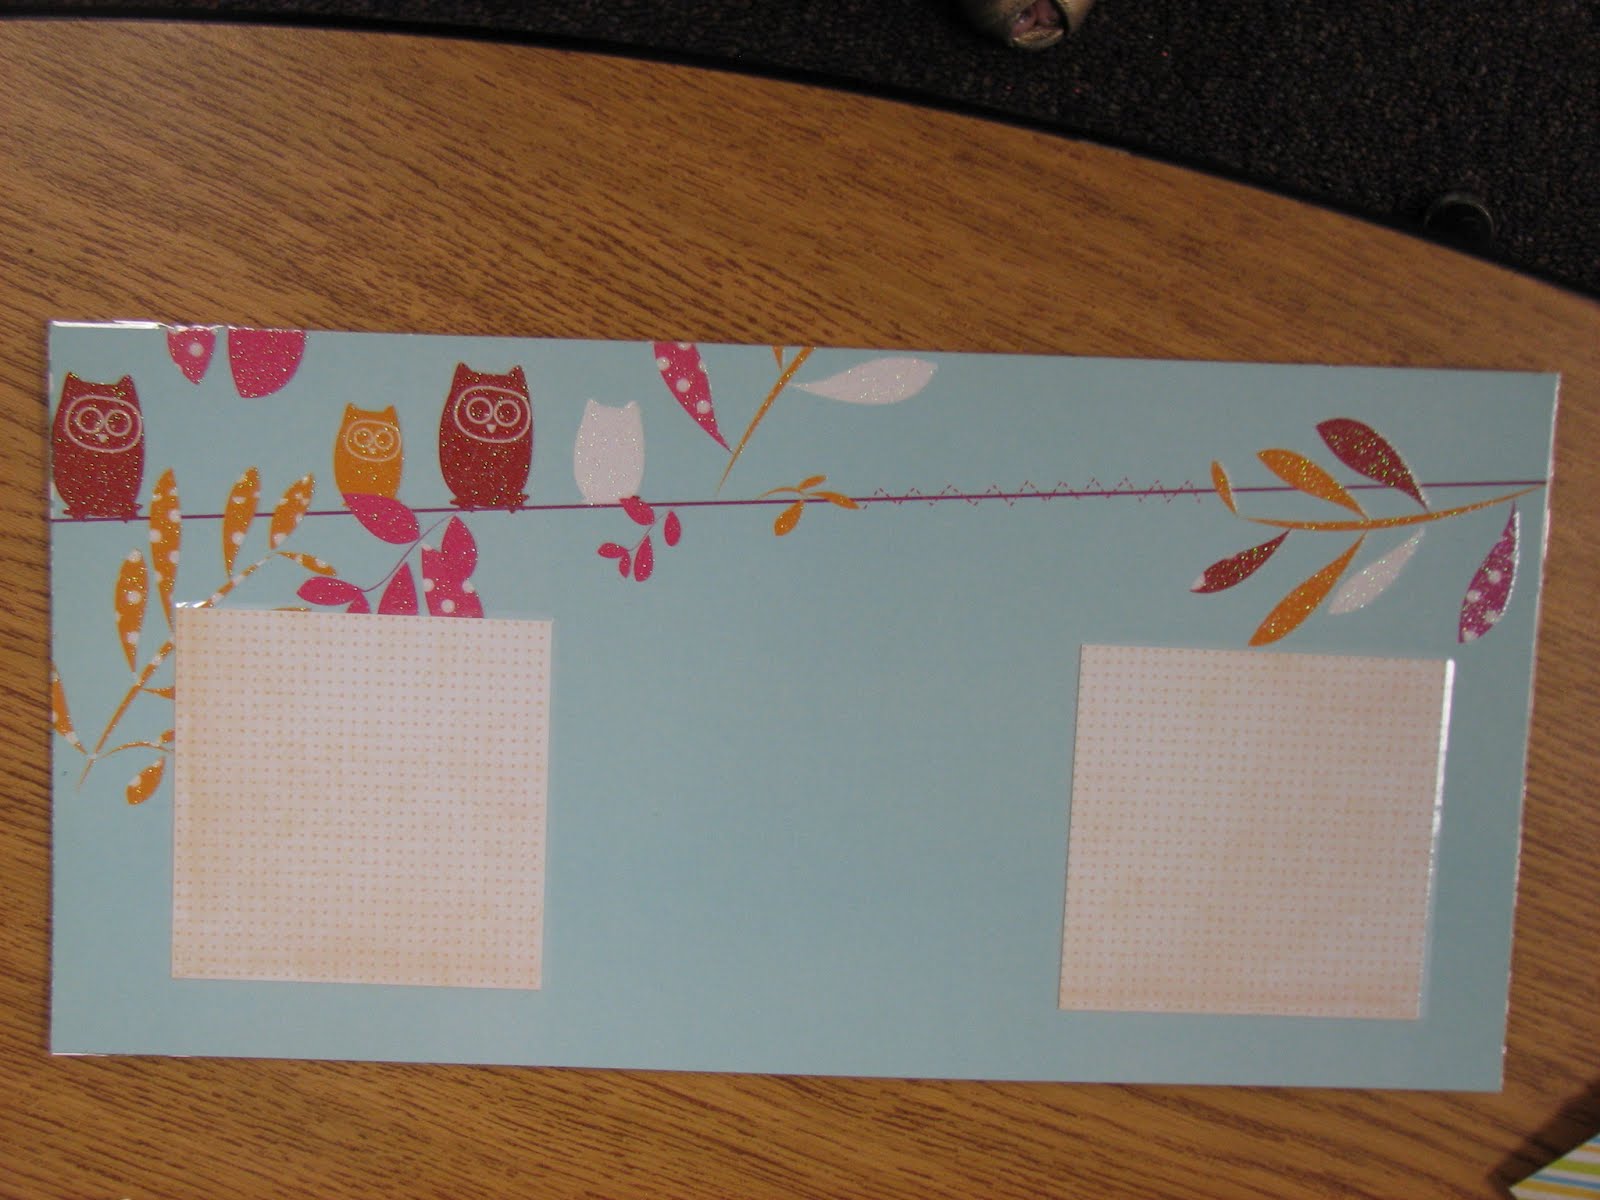
3. Lay out of the value mat before laminating.


4. The value mat with the squares glued on then laminated.


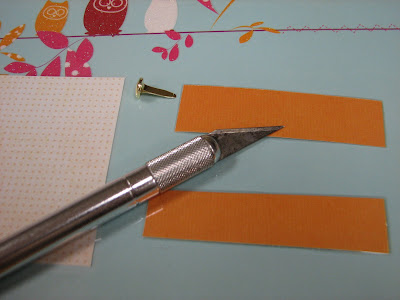
5. The tools and pieces needed to assemble the mat.


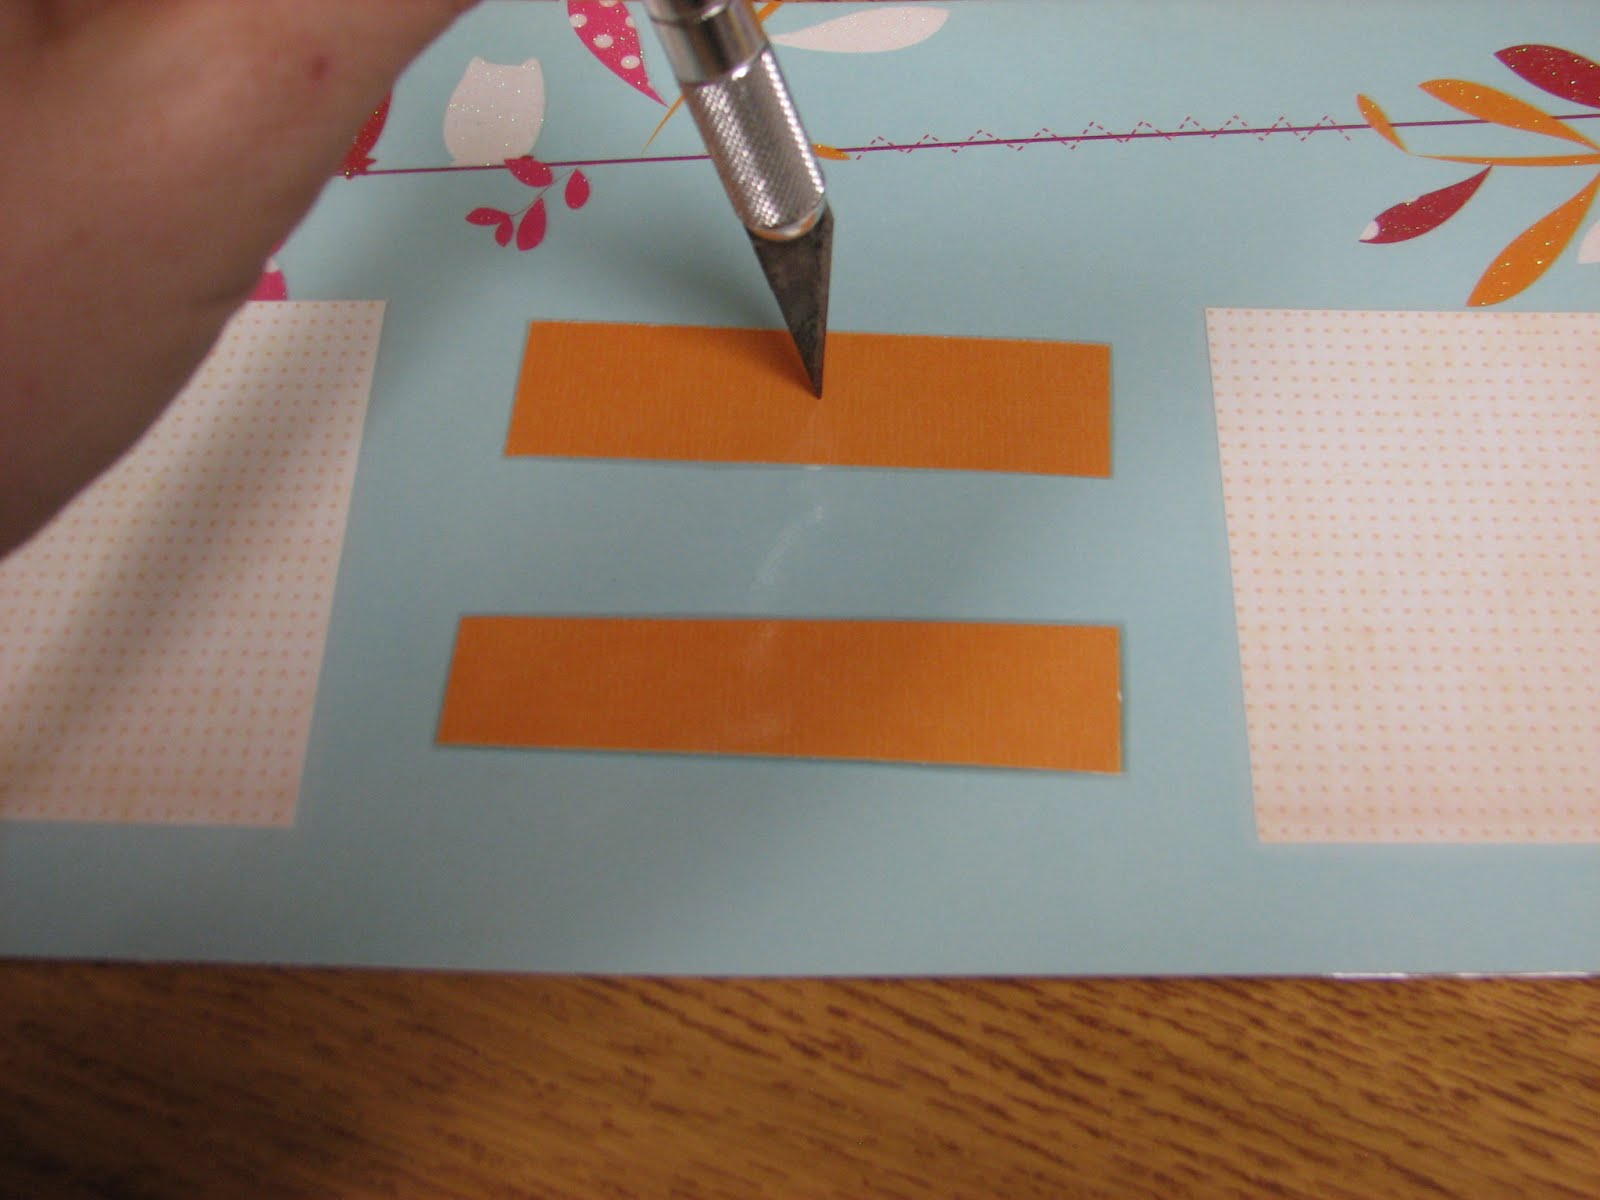
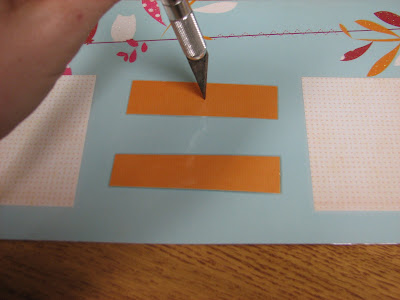
6. I put the little rectangles where I wanted them then poked the craft knife through both the rectangle and the mat to make little placement holes to mark the exact spot.


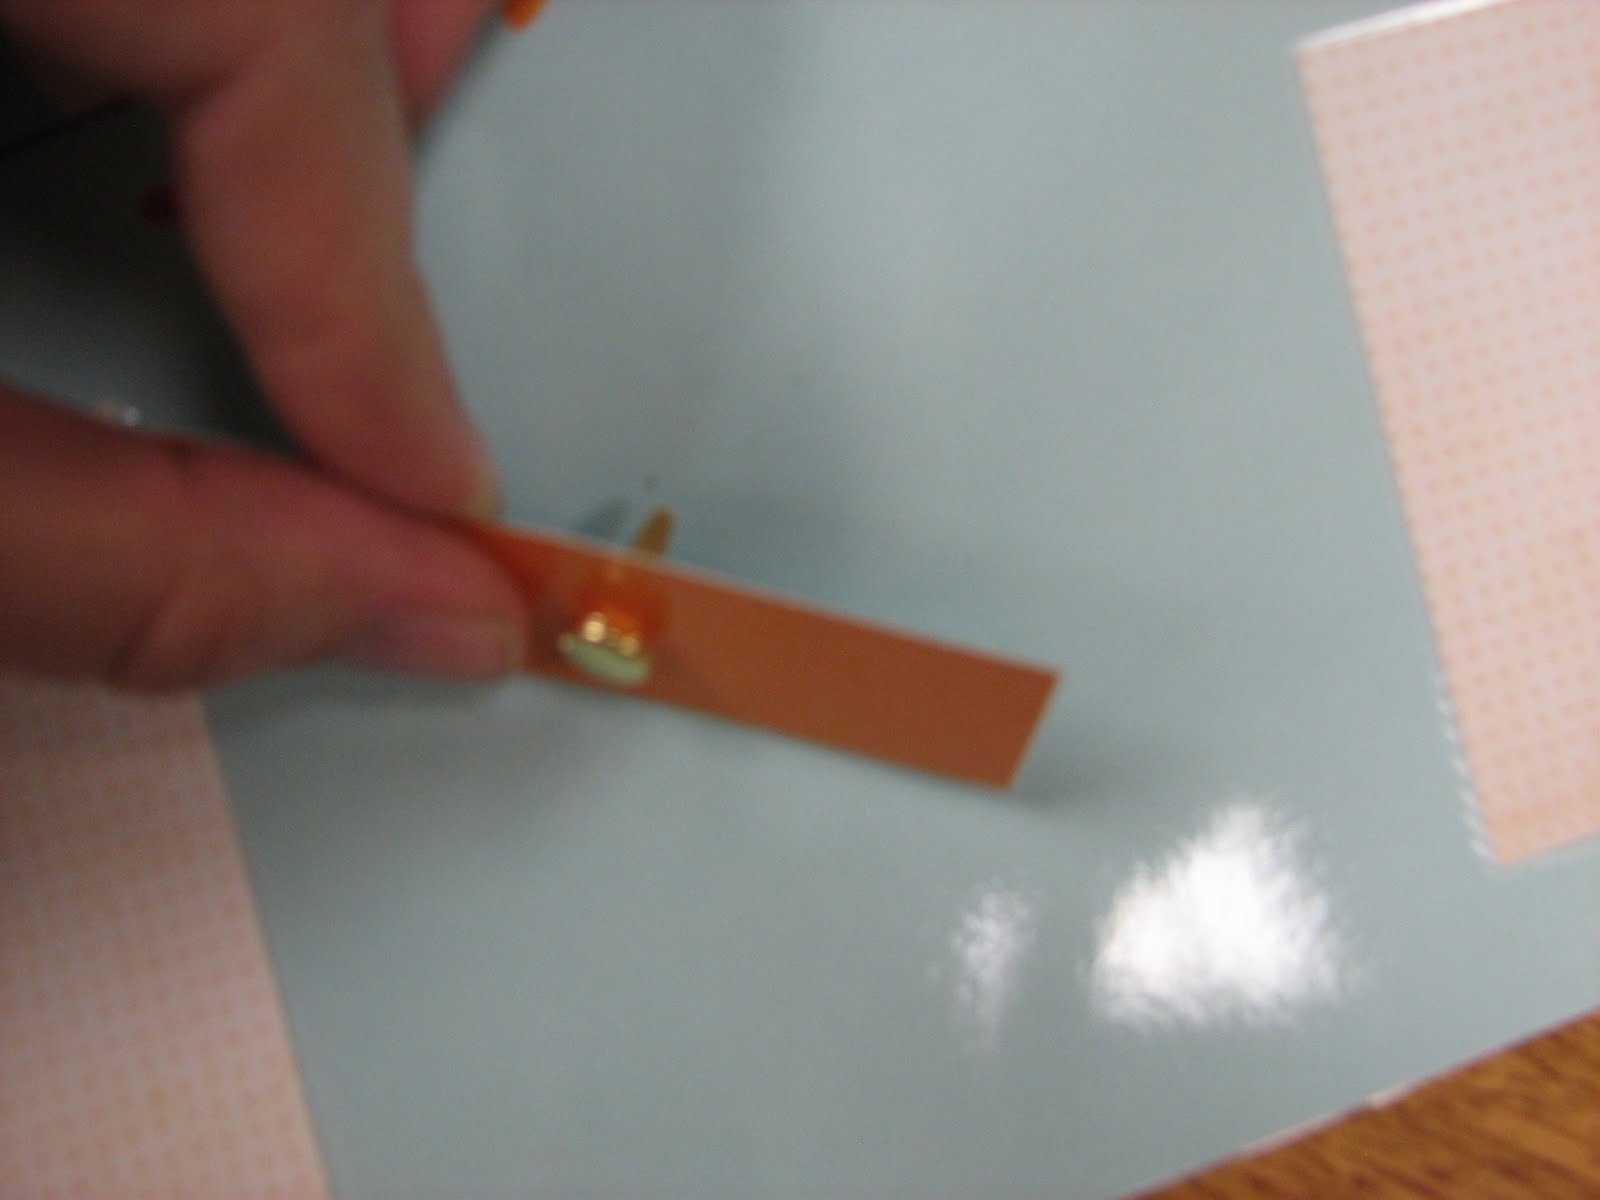
7. I put the fastener through the rectangle.


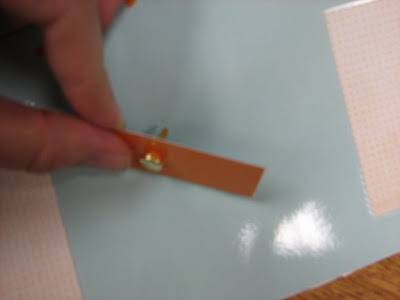
8. Notice the fastener is in the center of the little rectangle.


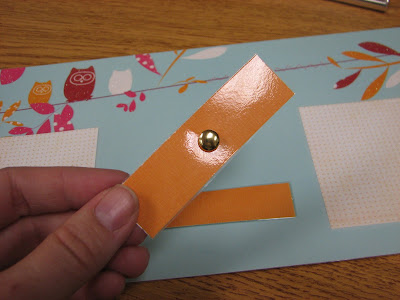
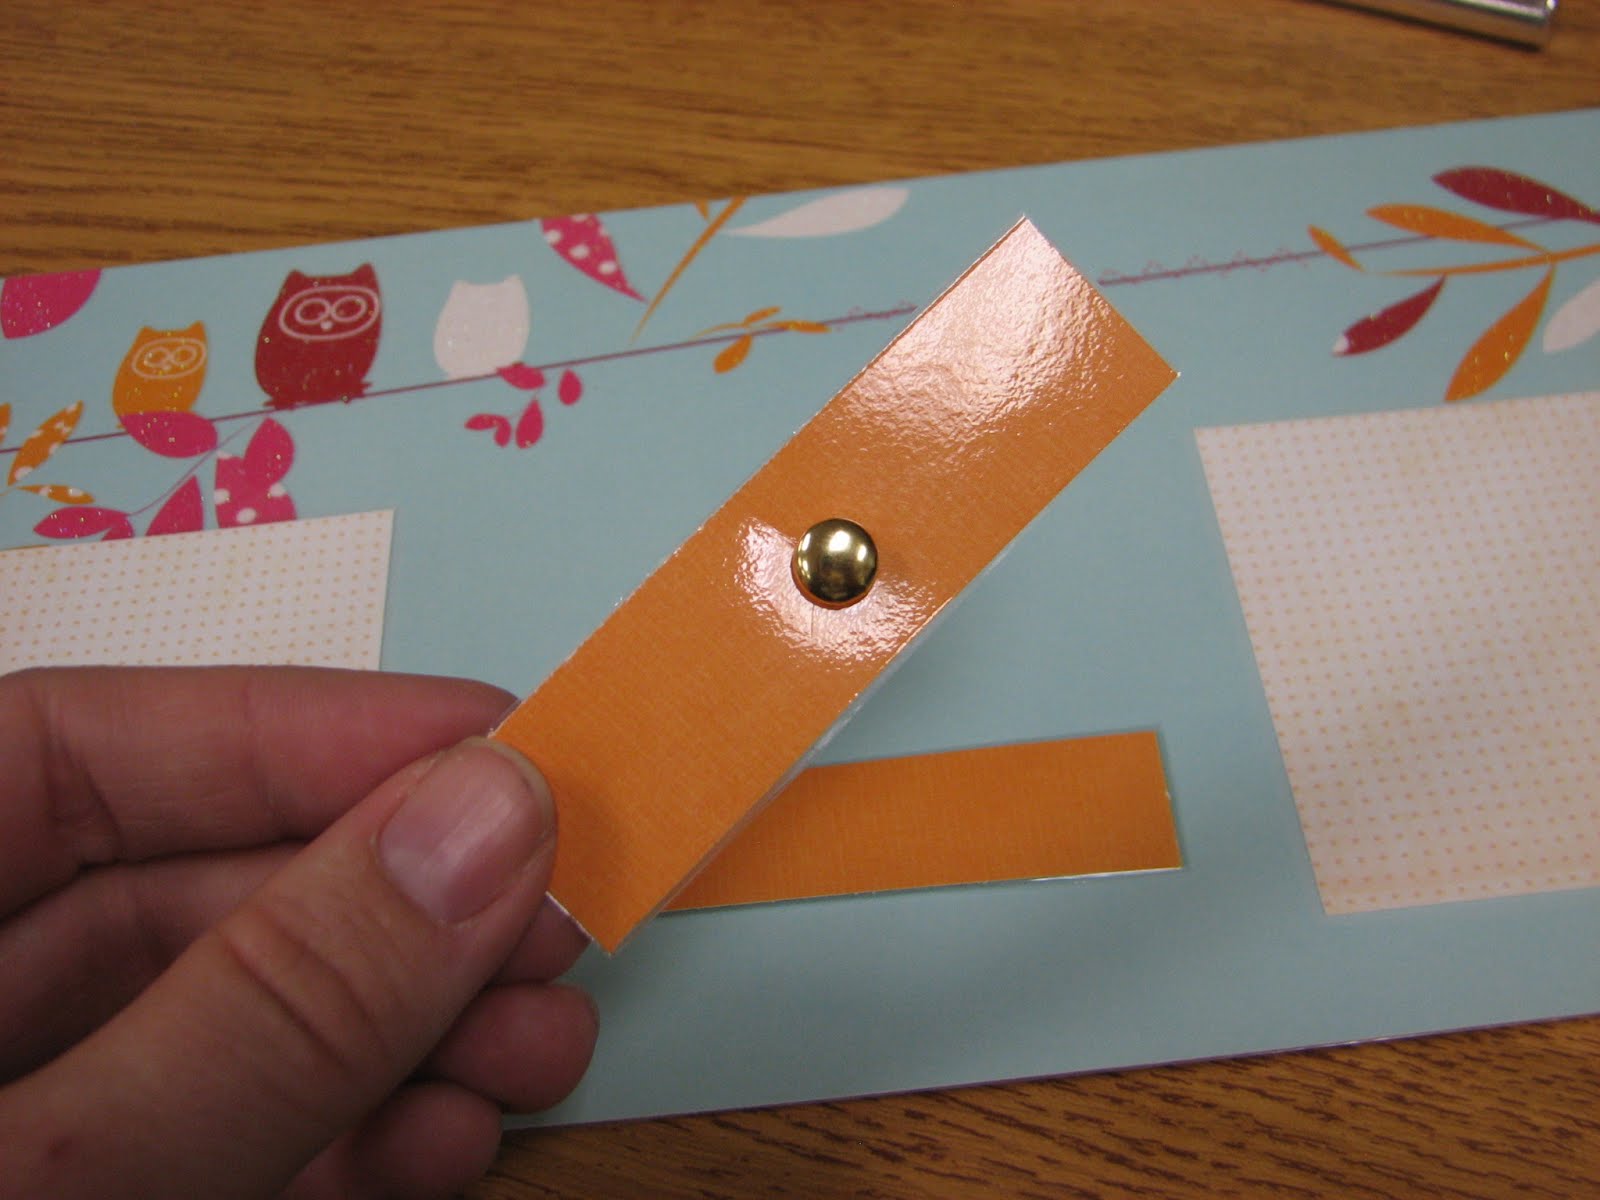
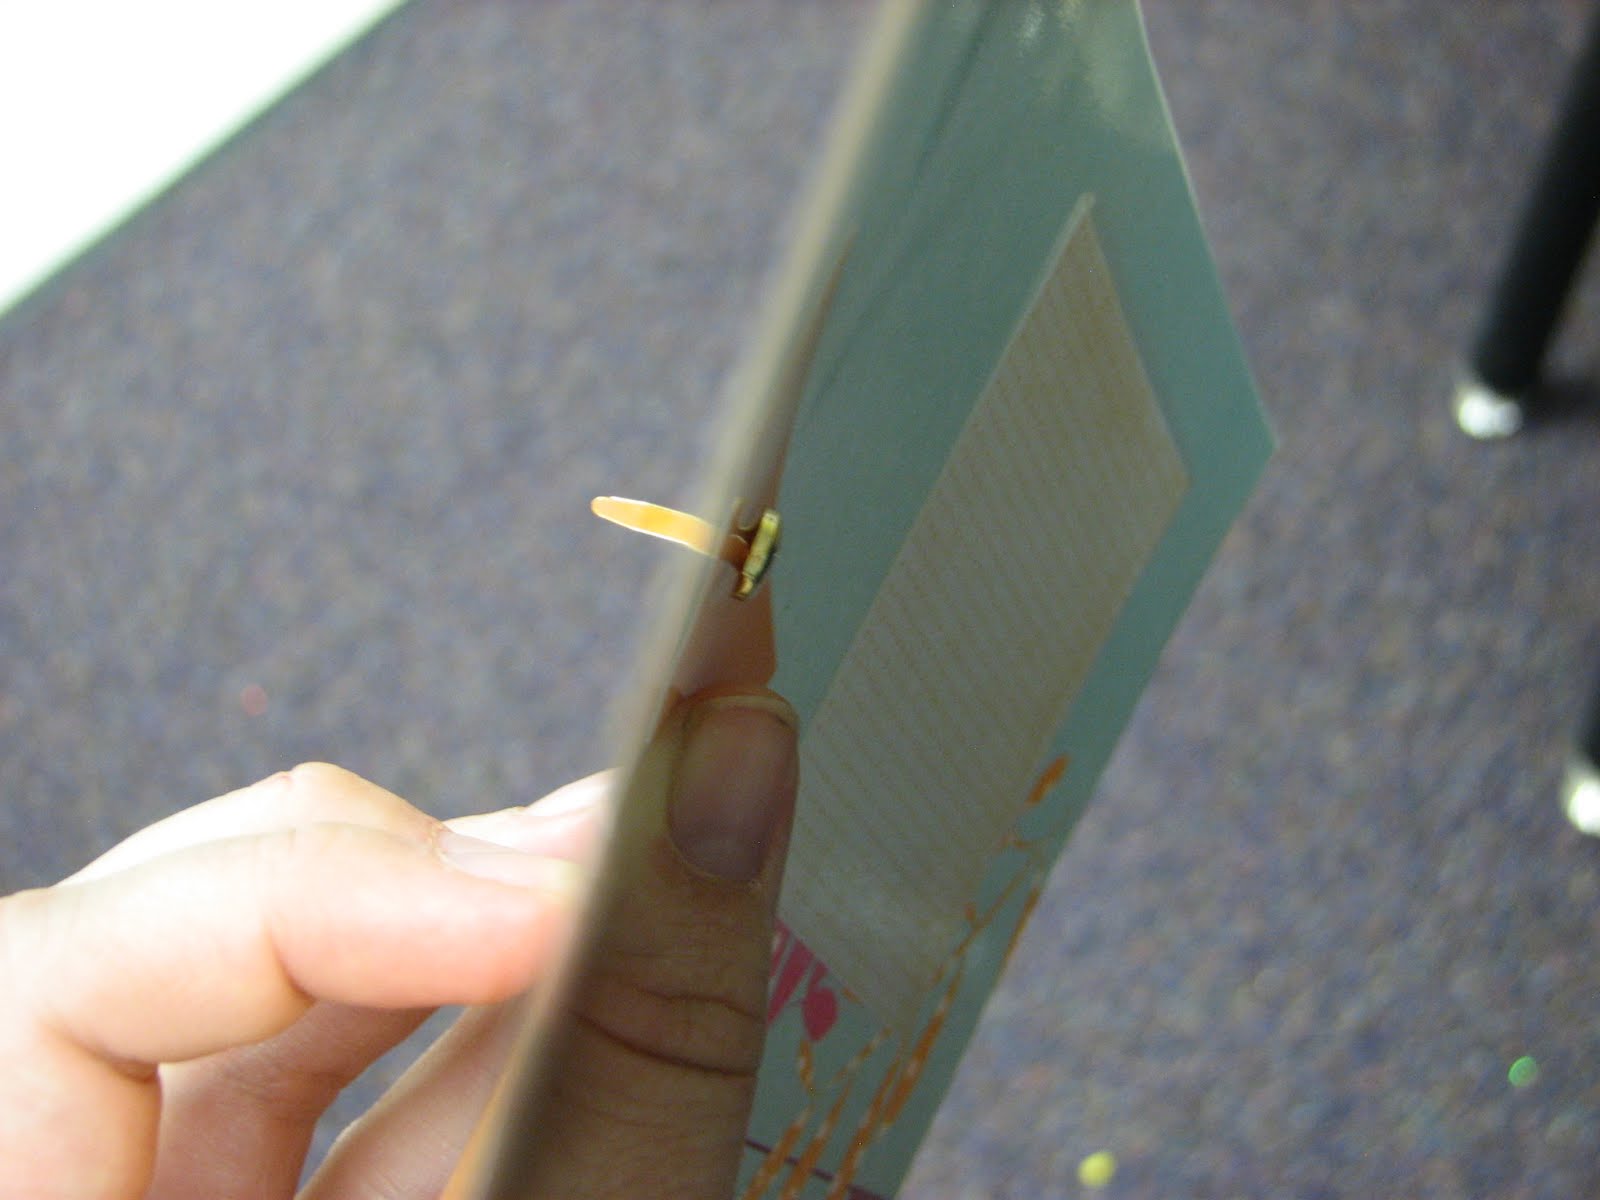
9. I then put the fastener through the mat and spread open the prongs to secure the placement of the little rectangle.

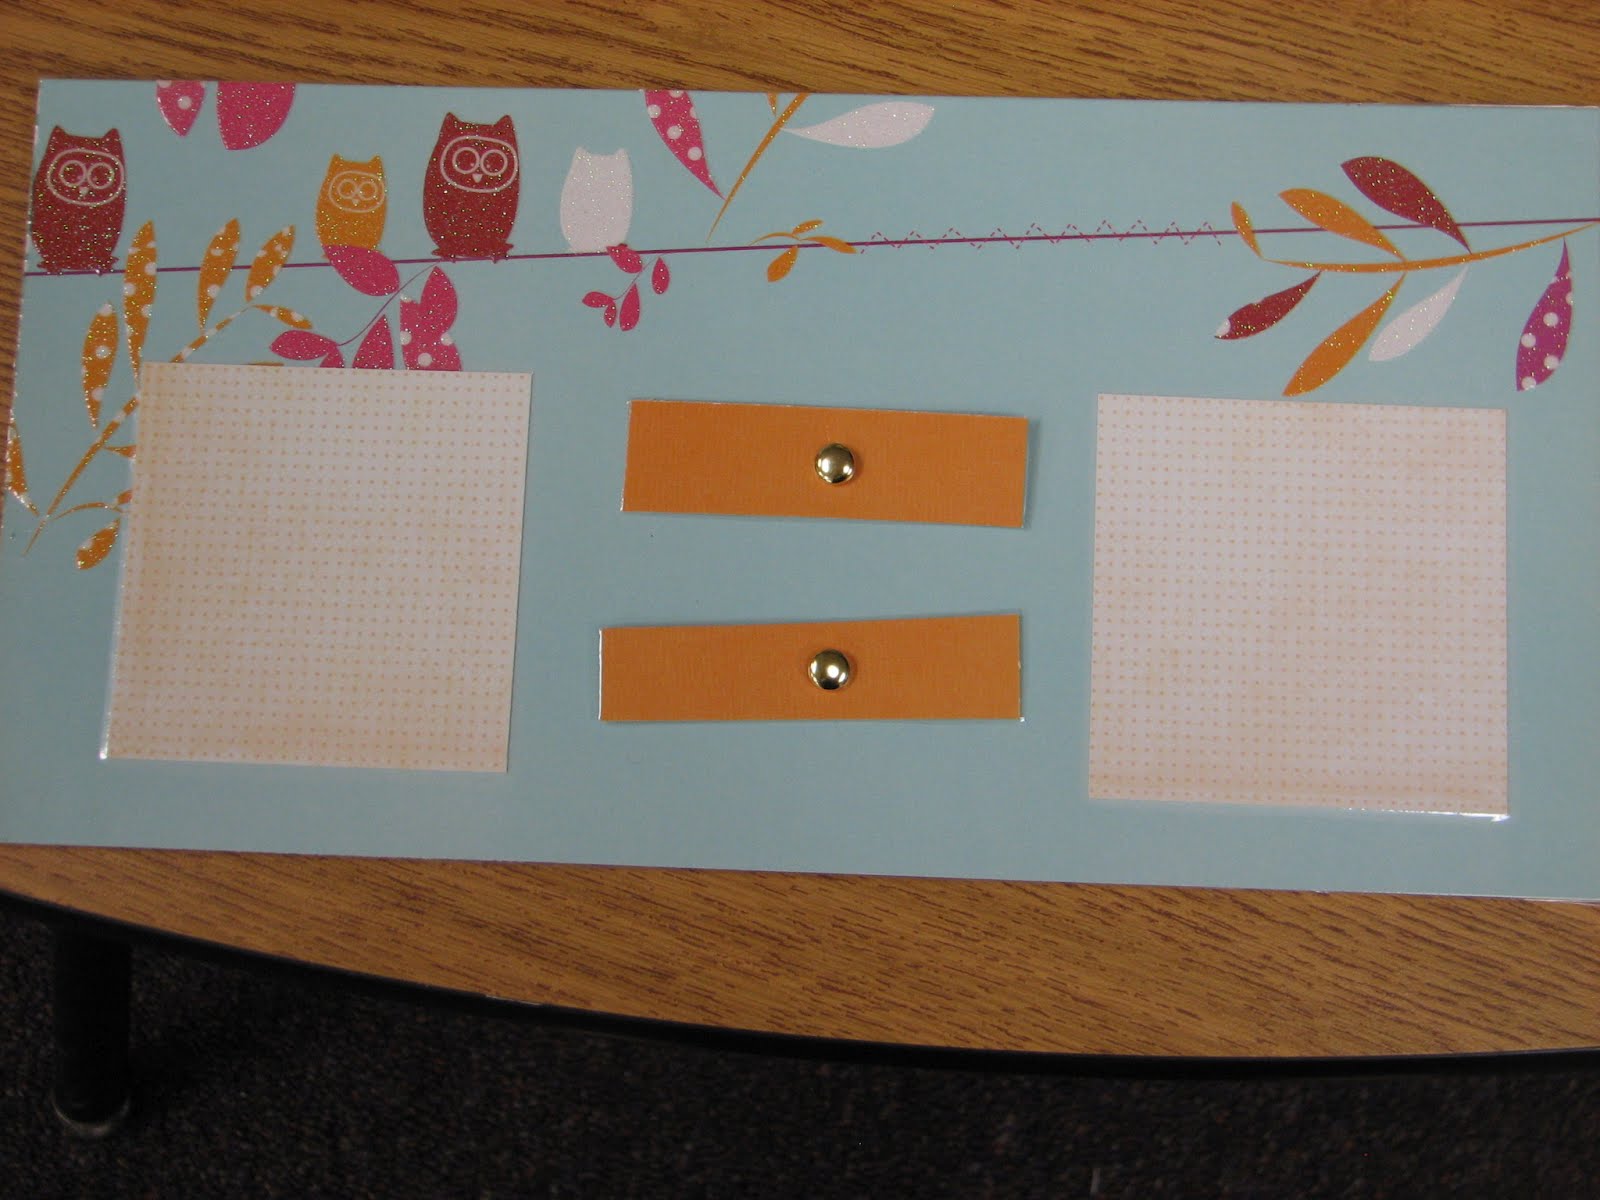
10. Here is the mat showing the equal sign.


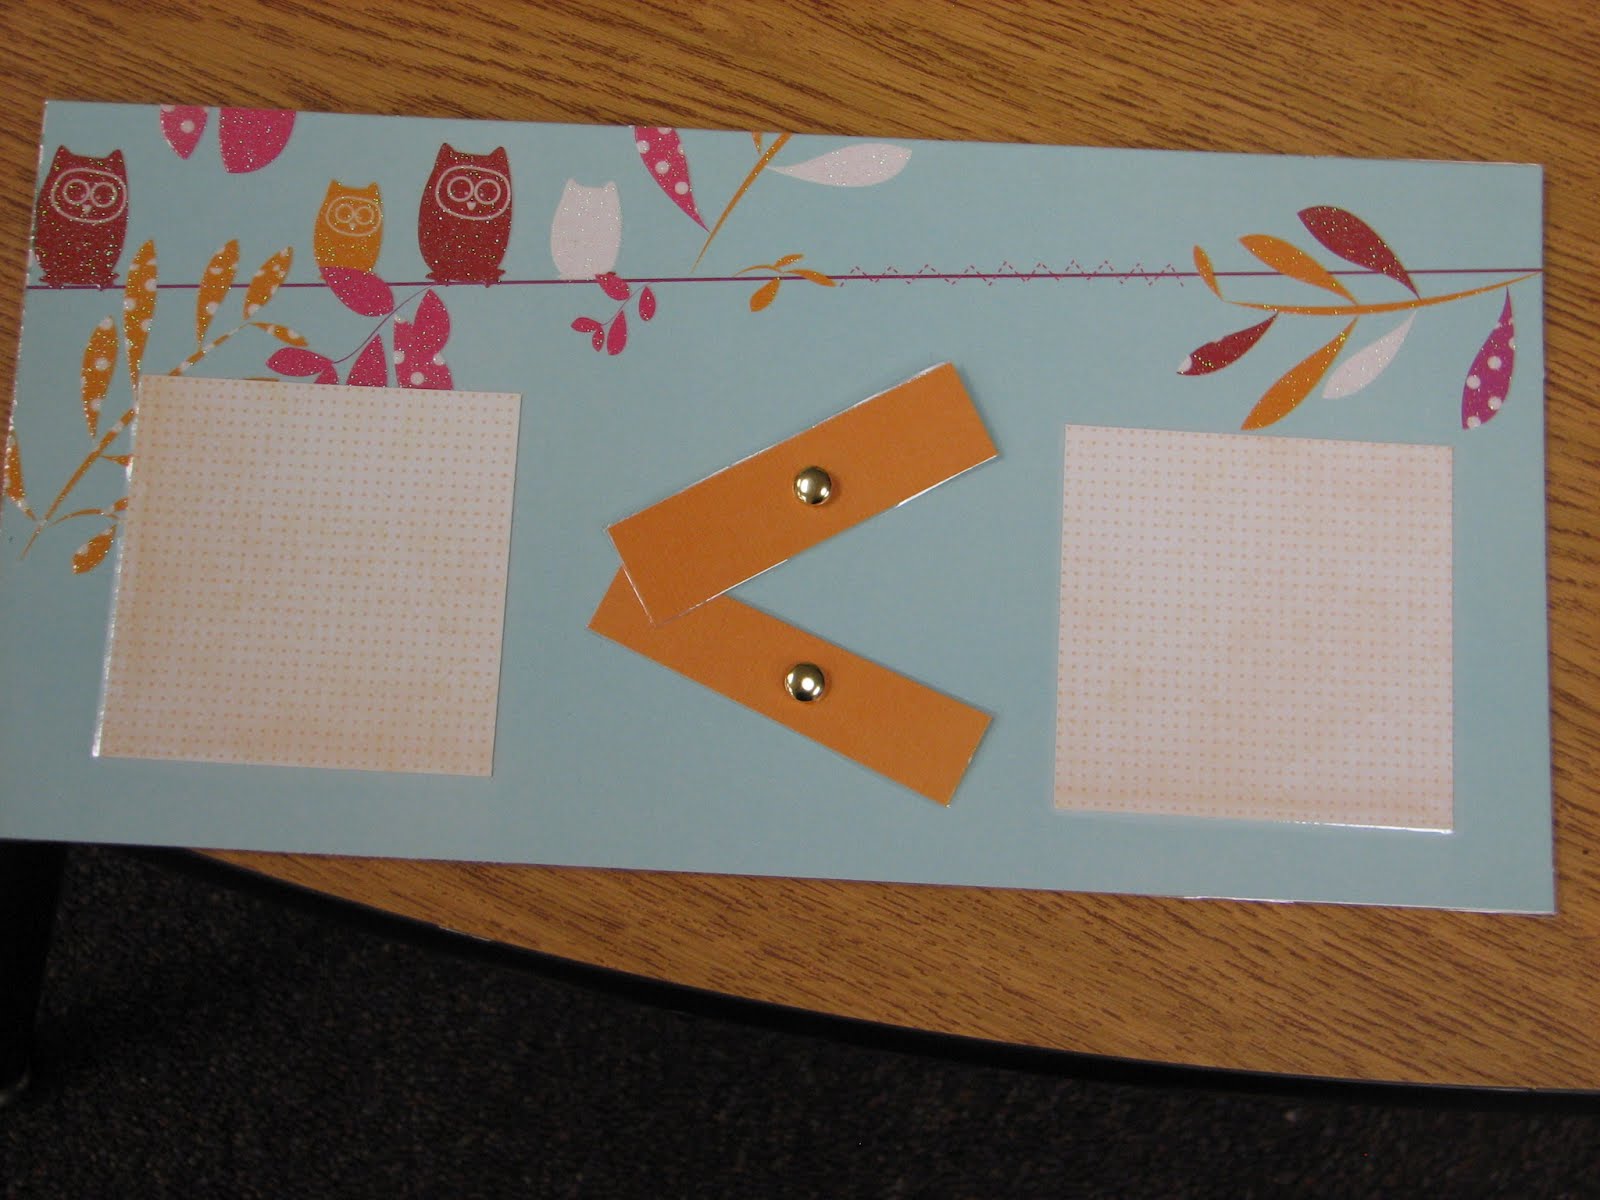
11. Here is the mat showing the less than sign.


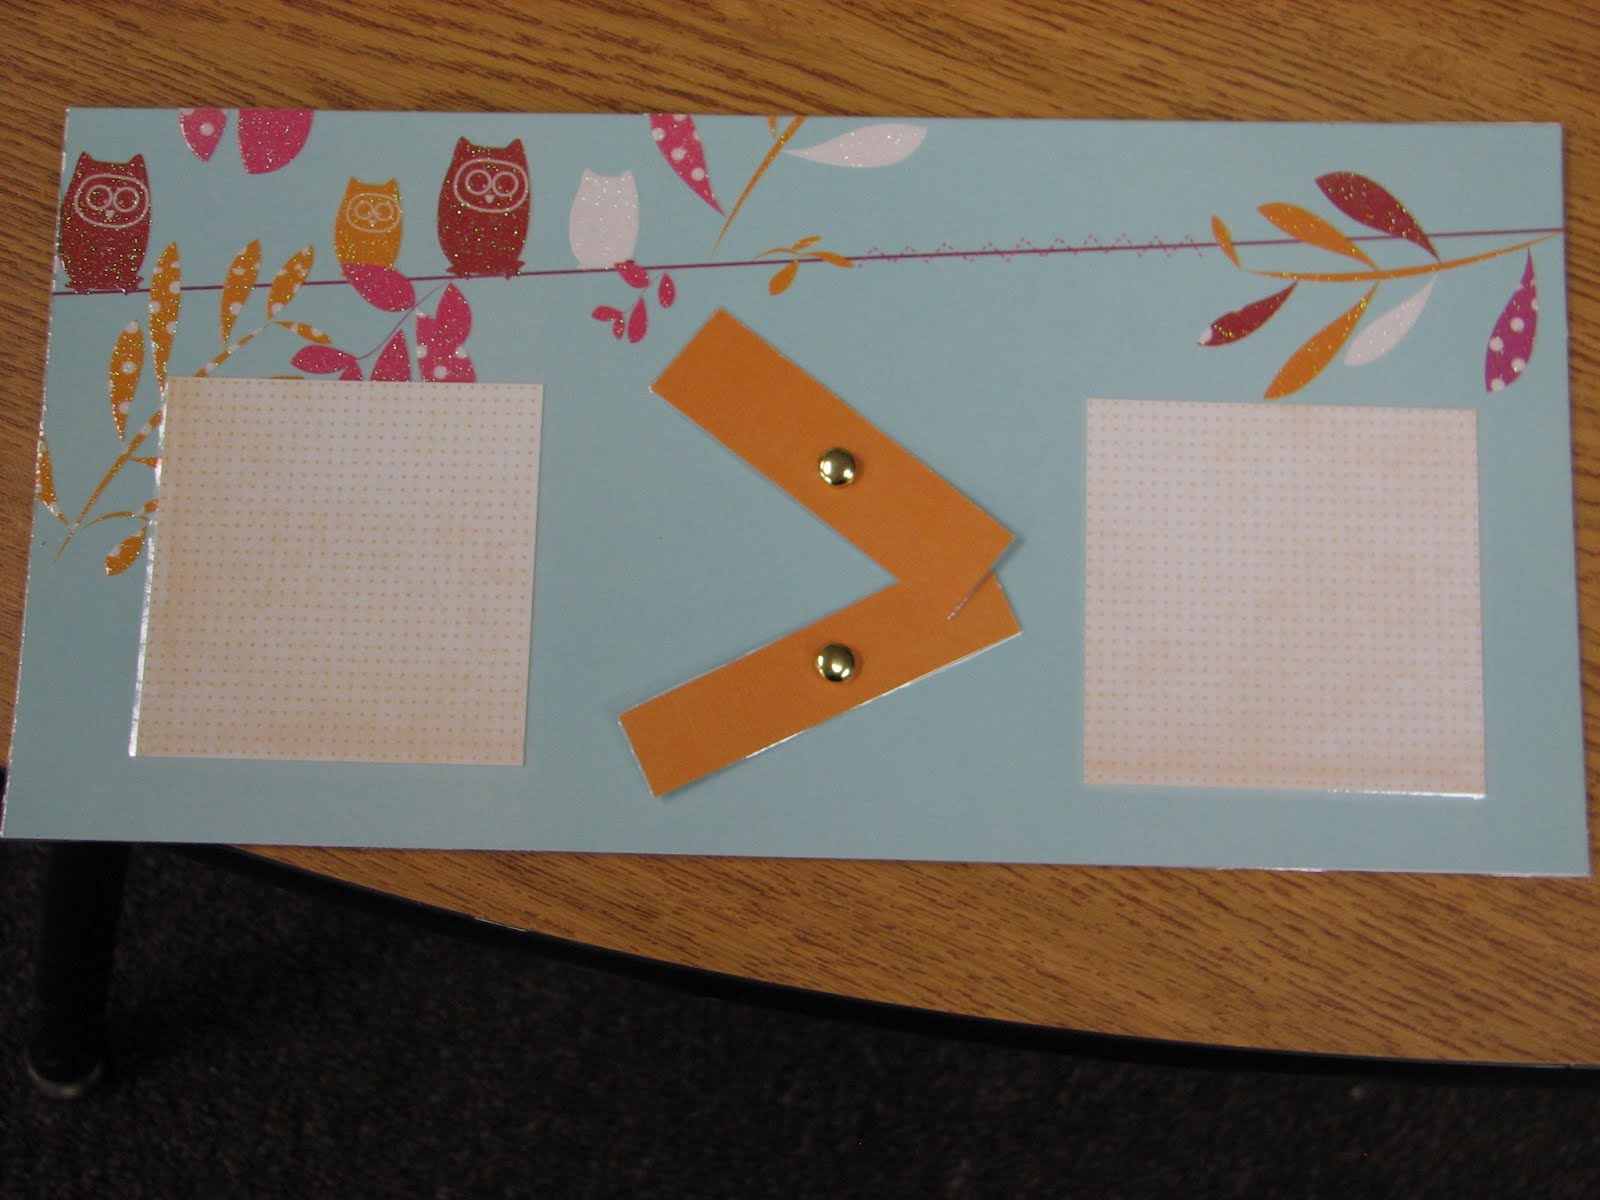
12. Here is the mat showing the greater than sign.


13. Here is the end result.

  
 I also typed up the directions as a document.  You can download the directions for FREE on my Teachers Pay Teachers store here.  Happy creating!
school blog signature